An electronic signature is a relatively recent innovation. You can now use electronic signs, symbols, and even sounds to authenticate a document instead of an old-fashioned “wet signature.” Unfortunately, Microsoft Word does not include many built-in capabilities for producing e-signatures. However, you may use a variety of extensions and applications instead. This article will teach you how to add your signature to Microsoft Word and explain how e-signing works.
Drawing an Electronic Signature in Microsoft Word
You can incorporate electronic signatures into Word documents. This is made possible by adding them as image files. Here’s how to include your signature in Microsoft Word using the program’s built-in features:
Step 1: Write your signature on a piece of paper as shown below.

Step 2: Use a scanner or a camera to capture the document. Save it as a.jpg, .gif, or.png file on your computer.
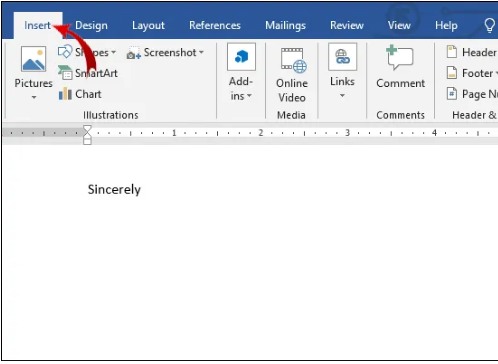
Step 3: Open the Microsoft Word document. On the menu bar at the top of the screen, go to the “Insert” section.
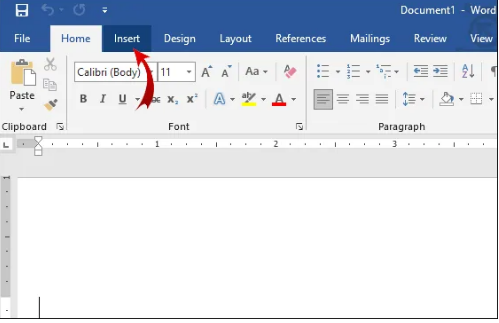
Step 4: Click “Pictures” to launch a new window. To find the scanned signature on your hard drive, input the file name into the dialog box. To add it to your document, click on the add button.
Step 5: If your signature is excessively large, simply edit it. When you click the image, you will see the “Picture Tools” section. In the “Format” tab, crop using “Crop.” On the right side of the screen, there are small dialog boxes that will allow you to input height and width manually.

How To Insert Additional Information in Word?
Quick Parts is the way to go. Here’s how to utilize it:
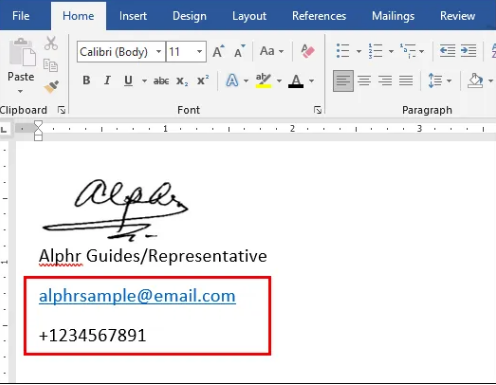
Step 6: Under the signature picture, type your phone number, email address, or job title.
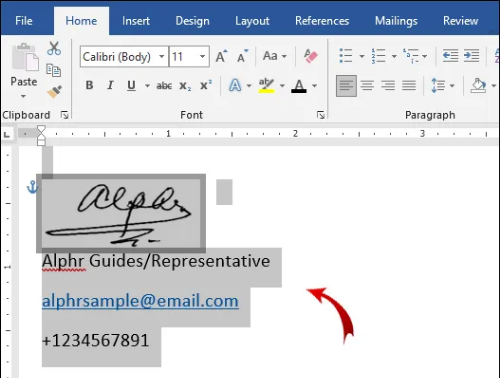
Step 2: Select both the image and the extra information with your cursor.
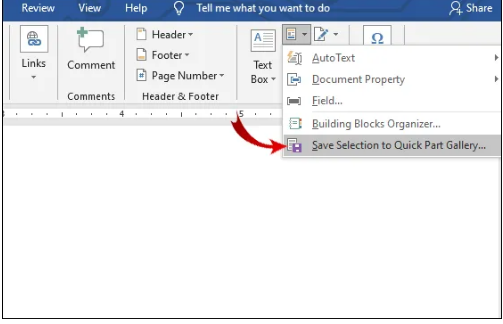
Step 3: Select the “Insert” option from the menu. Select on the “Quick Parts” tab.

Step 4: Right-click in the drawing area and choose “Save Selection to Quick Part Gallery.”
Step 5: To the left of “Name,” type the name of your signature.
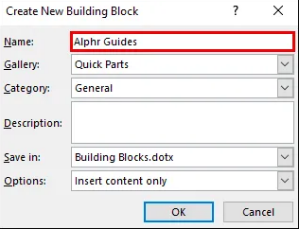
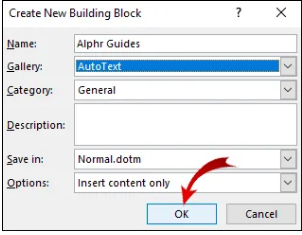
Step 6: Select the “Gallery” option from the drop-down menu. It should say “Auto Text.” If it isn’t, choose that option from the drop-down menu.

Step 7: To finish up, click “OK.”
Step 8: After you’ve completed your signature, press ENTER once to place the cursor where you want it.

Step 9: Navigate to the Insert then Quick Parts and then Auto Text.
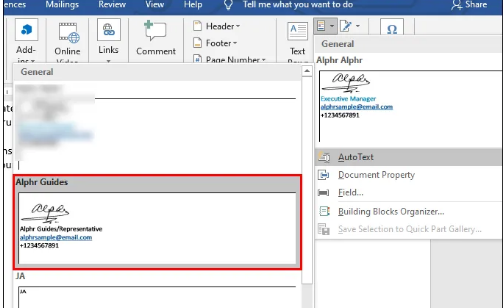
Step 10: From the selection of blocks, choose your signature.
How to Insert a Signature Line in Word?
MS Word includes signature features such as signature lines. A signature line indicates where you should sign the document. Here is how to add a signature line to your MS Word:
Step 1: Locate the cursor in the position where you want to sign your document.
Step 2: Click on the “Insert” part that is located in the menu bar.
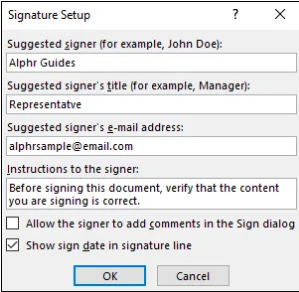
Step 3: Navigate to the Text, then go to the Signature Line, then Microsoft Office Signature Line as shown below.

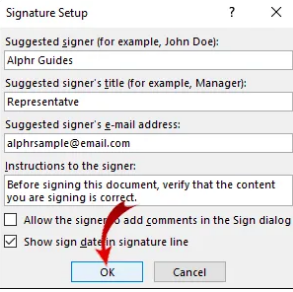
Step 4: A pop-up window appears as shown below, then write your title, name, and e-mail address on the appropriate boxes.
Step 5: Finish by clicking on the OK button.
How to Draw Signature Line?
Below is a step by step guide on how to draw the signature on the signature line:
- Open your Word document and make sure that you enable editing. If the document is in the “Protected View” mode, click on “Edit Anyway.”
- Open a drop-down menu by right-clicking on your signature line.
- Choose “Sign” from the list of choices.
- If you save your signature as an image, select “Select Image.” Locate the file on your computer using the “Choose Signature Image” dialog box. To submit it to MS Word, click “Select.”
- If you have a hard copy, simply type your name next to the letter “X.”
- To add a signature, click “Sign” and follow the on-screen instructions.
Frequently Asked Questions (FAQ)
You may use a scanner or a phone camera to add a signature to Word. Simply upload your handwritten signature to your PC using a photograph. Open the Word file and then select “Insert” from the menu options. You can also use add-ons in your browser to achieve the same thing. The majority of e-signing add-ons come with a free trial period.
You may use Word’s built-in features to sign a form electronically.
Below is a step by step way of doing that:
1. Select the signature line in your statement.
2. Navigate into the Insert button and then to the picture.
3. Use the find tool to search for your signature. Select the image of your signature and press the button.
Remember, before reading the document; you must provide a photo of your “wet signature.”
You may also sign a document with an add-on. Choose a suitable one that is compatible with your Microsoft Office version. If your file is in PDF format, you must convert it into word format. This is how to do that:
1. In the search engine, type “pdf to word converter” and press Enter.
2. Select the document. Upload the PDF file and then select “Convert” from the drop-down menu.
3. Download the file after you complete the process.
What is the best example of add-ons that can be used to draw a signature on a word document?
You can, however, sign documents using your computer mouse with certain add-ons. PandaDoc is an example of one such tool. This is how you can achieve that:
1. Open the file in PandaDoc.
2. Select the “Signature” option in the panel on the right side.
3. When given the option of “Draw” or “Paste,” choose “Draw.”
4. Write your name on the document with your computer mouse.
Conclusion
When it comes to creating your e-signature, Microsoft Word falls short compared to Google Docs. There are certain built-in capabilities that it doesn’t have. You’ll also need a scanner or a camera if you want to use it. Fortunately, there are numerous e-sign add-ons that work with Microsoft Office programs. Some extensions, such as PandaDoc, mobile apps for Android and iOS are also available to help you.