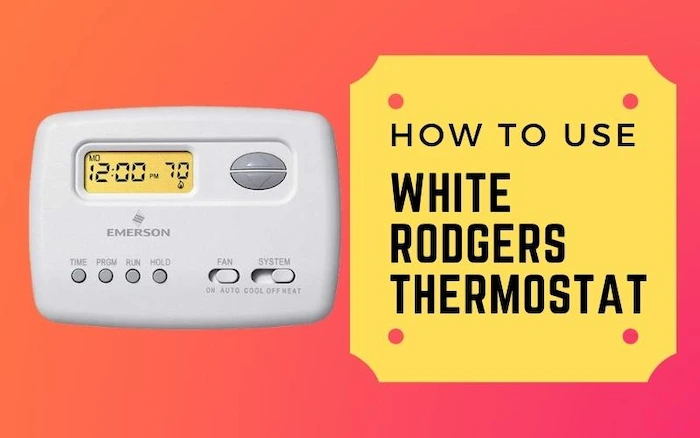
A white Rodger thermostat will be a lifesaver when you want to regulate your home’s temperature. The White Rodger programmable thermostat is among the best thermostat brands in the United States. You may create a personalized heating and cooling schedule for your house ahead of time, based on your weekly routine with this device. Basic and touchscreen thermostat versions are available in the White Rodgers range, both of which are incredibly simple to set up.
How Does a White Rodgers Thermostat Work?
White Rodgers thermostats are the most common line of home thermostats. Their programmable series are affordable and also user-friendly. They’re also simple to set up and repair when necessary. The popularity of white Rodgers thermostats is due to their compatibility with most basic heating and cooling systems.
To turn off the White Rogers thermostat program, hold the Hold button and then alter the temperature with the Up and Down arrow buttons until you reach your desired temperature for an indeterminate amount of time. The thermostat will only decrease the temperature when you press the Run button to enter program mode.
Not all White Rodgers thermostats are battery-powered. The majority of current models connect directly to the home’s electrical system, with others incorporating a battery backup and still others running solely on batteries.
Programming White Rodgers Thermostat
After you become familiar with it, the White Rodger Thermostat programming procedure is quite simple. In addition, the White Rodger thermostats are very efficient and were designed carefully to alter the temperature according to how they are needed at various day times depending on the user’s predefined settings. Let’s get started with programming a White Rodger Thermostat. The procedure for programming the White Rodger thermostat has been described as follows:
#Programming the Time
- Step 1: In the button “Set time” menu, select a new hour. The hour will automatically appear.
- Step 2: Use the down or up arrow keys to select an hour’s time.
- Step 3: When setting the hour, press the “Set time” button.
- Step 4: Close the program and then, using the “Run program,” finish and save the software time settings.
#The Heating and Cooling Temperatures Programming
- Step 1: Set the system switch to “Cool” or “Heat” as desired.
- Step 2: Set the required temperature for your first heating/cooling period by pressing the “View Program” and pressing the Up or Down arrow key.
- Step 3: Select “Set time.” The up and down arrow keys may be used to adjust the duration of the program. To return to temperature mode, press the “Set time” button.
- Step 4: Press the button “view program” the second time and begin setting up a second program.
- Step 5: When you’re finished, follow these steps: Select “Run program” in the window that appears. For the next program (heating or cooling), whether it’s required or not.
How to Reset a White Rodgers Thermostat?
It might be essential to keep resetting a thermostat from time to time. Resetting a thermostat to its original setting might help solve issues related to programming your thermostat connection problems. Another incentive to reset your thermostat is if you get yourself turning the air conditioning on but being unable to maintain your desired temperature. Resetting the four most popular sorts of thermostats is straightforward. Read on to learn how you can reset them.
There are several varieties of thermostats, each with its own method for resetting. Follow the instructions that came with your thermostat if you want the greatest results. If you don’t have these directions, there are internet articles and videos that will assist you in finding the most effective way to reset your specific thermostat.
How Can You Reset Thermostats of All Varieties?
What kind of thermostat do you have? Resetting your home’s thermostat is straightforward. Resetting a Programmable Thermostat To reset a programmable thermostat, you will either remove the batteries or flip the battery switch. Here are the instructions for carrying out the procedure:
- To turn off your thermostat, set it to the “off” point.
- Locate the screws that secure your battery door. Remove them to open the door of the battery. If you have a thermostat on the wall, be sure it’s disconnected before opening the battery cover.
- Remove batteries.
- Put the batteries in reverse for five seconds, with the negative terminal parallel to the positive si.
- Disconnect the backward power batteries and replace them in the correct position.
- When the display comes on, the thermostat will already be reset, and you may test to see whether this has resolved any HVAC or programming issues.
To reset a low voltage thermostat, you must first clean the parts and try different settings. These thermostats are frequently found in baseboard heating systems.
Here is a step-by-step guide:
- Remove the cover of the thermostat
- Gently clean the internal components using a brush.
- Set your thermostat to the lowest cooling position.
- Clean the parts using a soft brush again.
- Set it to the highest heating position and clean the thermostat coil one final time.
Resetting a digital thermostat(non-programmable) is easy. Take the cover off and press the resetting button for a few seconds.
Mechanical Thermostat
Diagnosing a mechanical thermostat problem, start by removing the cover and double-checking that everything is secured within the thermostat. Given that all appear to be in order, you might be required to reset the thermostat’s circuit breaker. Because these thermostats cannot be programmed, they must be set, turned off, and turned on manually. They’re also not battery-operated, so they need to be reset via the circuit breaker. Step-by-step instructions for resetting:
- To completely turn off your air conditioner, press the thermostat button until it says “off.“
- Look for the breaker that controls the HVAC system to ensure that it is turned off.
- After waiting 30 seconds, turn the thermostat breaker on again.
- Ensure you turn on the thermostat again.
White Rodgers Thermostat Troubleshooting; What to do?
Since 1936, White-Rodgers, a division of Emerson Electric Co., has been producing thermostats. In 1961, it was purchased by Emerson Electric, which is now based in St. Louis. The thermostats are usually faulty due to no heat or cooling. Another possible problem is the continuous operation of the heating, ventilation, and air conditioning equipment owing to a small.
Step 1: If there is no heating or cooling, check whether the household power supply has been stopped. Check the breaker panel and look for tripped breakers or blown fuses. Ensure that the HVAC equipment is switched on. A switch for the outside unit might be found outside of split systems. To function, the blower, heater, and air conditioner require electricity. If there is no heat, light the pilot.
Step 2: To check the thermostat’s heat function, set the system switch to “Heat.” Remove the wires from terminals R and C and replace the batteries for two minutes after opening the thermostat cover. Raise the thermostat’s temperature above the ambient temperature again and listen if there is a click. If you don’t hear it, change the thermostat. Have your HVAC system serviced if you do hear a click, but the heat does not function.
Step 3: To examine the thermostat’s cooling function, turn on the system switch and set it to “Cool.” Reduce the thermostat temperature below ambient. You can de-ice your windshield by removing the grime and ice that has accumulated on it. If you don’t, reset the thermostat. Remove the wires from terminals R and C, replace the batteries, then restart your car. Lower the temperature of the thermostat to below the ambient temperature once again and listen for a click. If you don’t hear a click when you replace the thermostat, something is wrong. If you hear a click but the cold does not work, have the HVAC system serviced on the air conditioning side.
Step 4: If the HVAC system continues to run, check for shorts on the cover. Check for bare wires; one should not be visible from the block. The fan switch may also be set to “Fan” instead of “Auto.“
How to Remove White Rodgers Thermostat?
For nearly as long as there have been heaters, Rodgers has been a renowned name in thermostats, but these days, people are increasingly replacing their old thermostats with ones that connect wirelessly to mobile devices and laptops. The swap is simple because the new thermostat will connect to the same wires as the old White-Rodgers thermostat and operate in the same manner, regardless of its greater functionality.
The most essential aspect of removing an old thermostat is keeping track of the wires. The wires are intended to be color-coded, but you can’t trust the person who installed the thermostat to follow the color code, so each wire must be labeled before being disconnected. Take a photo just in case one of the labels falls off as an insurance policy.
Step 1: Turn Off the Power
Locate the break on the panel that controls the boiler and turn it off. The thermostat wires only carry 24 volts of electricity, so you won’t be given a dangerous shock if they contact one another, but if they touch something inside the control panel, they could potentially short out whatever it is, so it’s best to be cautious.
Step 2: Remove the Thermostat Cover
Remove the cover by tugging it sharply. It’s a snap-on cover, so give it a firm yank and it should come off.
Step 3: Remove the Temperature Sensor Plate
The temperature sensor, on many thermostats, is attached to a separate plate. Locate the screws that retain it and remove it using a Philips or flat-head screwdriver.
When removing an older mechanical thermostat, you may find a vial of mercury in the sensor. Do not drop or break this vial, and do not dispose of it in the garbage. Call your local health department for information on how to properly dispose of it. Mercury is hazardous because it is poisonous and an environmental pollutant.
Step 4: Label the Wires
Place the new thermostat in its location and note the letter next to each terminal. Labeling the wire connected to that terminal with the same letter is a good idea. You may use masking tape and a pen to label this wire. This is an excellent opportunity to take an insurance photo with your smartphone.
Step 5: Disconnect the Wires
Loosen the terminals by unscrewing a screw or pushing on a lever, then pull out the wire. To keep the wires together and make it simpler to pass through the hole in the base, gather them with a piece of tape. To avoid this, make sure the wires do not fall into the wall. Retrieving them will be difficult.
Step 6: Remove the Base Plate
Unscrew the base plate’s mounting screws and carefully pull it straight out while feeding the wires through the hole. If you’re going to be more than a few minutes away from the thermostat, you might want to tape the wire bundle to the wall after taking off the base plate to make sure the wires stay put.
Important Facts Before Buying a White Rodgers Thermostat!
#Decide whether you’re interested in a non-connected programmable thermostat or a smart thermostat
A non-connected thermostat will do in a pinch, and they’re far more affordable. If you want to use your voice or an app to control your thermostat or let it learn your habits and adjust the temperature to fit them, you should consider buying a smart thermostat. Factor in smart characteristics (such as geofencing), price, and features that are important to you, such as color, size, or design, to narrow down your selections.
#Consider your HVAC system
With intelligent thermostats, in particular, this is a big issue since not all models support all sorts of HVAC systems. The Nest Thermostat E does not support two-stage heat pumps, but the Nest Learning Thermostat does. You may also need a thermostat for each heating and cooling system, as well as for each zone of heating and cooling.
#Consider your home’s aesthetics
You should think about whether this is a worthwhile investment if the item you’re replacing will be on your house’s wall for the next decade. Thermostats, especially smart versions, are now available in a variety of shapes and designs. The classic rectangular design of Google Nest thermostats or the modern, all-glass rounded-square style of Ecobee devices is two options. Honeywell Home and Lennox thermostats have a more contemporary boxy appearance with large displays, while Emerson, Hunter, and Lux models have a more conventional appearance than you’d expect from programmable. Of course, the choice is completely yours when it comes to aesthetics. You’ll be living with it, so pick a design that complements your decor.